Showing posts with label baby. Show all posts
Showing posts with label baby. Show all posts
Tuesday, November 21, 2017
Baby Blanket
My go-to gift for babies are baby blankets with their name embroidered on them. They are big but not huge and made from soft flannel so they are lightweight and keep them warm. In fact, my 6 year old still snuggles under his when he is watching movies sometimes. This is one that I did for my friend I thought that it was so pretty that I needed to share it with all of you.
Friday, January 31, 2014
Another Boy Onesie
Ok I told you guys that I was excited about this one earlier this week. I have seen onesies similar on the internet and have always wanted to make one then the hat kind of came along for the ride to complete the package.
I used a pattern to make the hat.
The actual onesie itself I kind of winged it and I'm thrilled at how it turned out. I will definitely will be making more of these.


Wednesday, January 29, 2014
Baby boy onesies
My sister-in-law is having her first baby in March, they found out it is boy. I made some onesie's for her. This one I made from an inside joke they have with my oldest daughter.
Here is a close up.
I made this one because hockey is a big sport in my husband's family. I have another onesie to show you guys but I'm saving it for another day I am really excited about it.
Wednesday, December 11, 2013
Christmas Hair bows
I'm sorry for the bad quality of picture. I thought that I had gotten a better one of the bows but I can't seem to find it. I made these bows for my girls to go with their Christmas shirts. I made them the same way that I did here.
Wednesday, June 26, 2013
Matching Sister Dresses!! From one shirt and a yard of Fabric
To do the top part of the dresses I used the same method as here. For the baby one I did the same idea but had to cut a neckline and sleeves.
I basted the top of the fabric width wise to create a ruffle effect and made it fit to the width of the shirt part, I pinned it to the shirt and sewed it on. I repeated the process for the back of the dress. I then sewed the sides together for the dress going from the edge of the sleeves clear down to the bottom of the skirt. Then all I had to do was hem it.
I did add a little bit of the flowers to the top of the dress for my older daughter and added a bit of a scrunch in the front of the baby's dress. Otherwise the process was pretty much the same. Instead of hemming the sleeves and the neckline for the baby's dress I added a binding.


Wednesday, September 19, 2012
Infant Tutu
I was over at a friend's house and she had out a tutu skirt similar to this on the table. She told me that her sister-in-law bought it for her and after looking at it I decided that I could easily make it and for tons cheaper then it was bought for. Total it cost me about $2. I already had the headband and a yard of tulle was $1.49.
I first cut the whole yard into strips and cut each strip in half.
I then went around again the next row up this time I went every other hole.
Here is the finished product.


Wednesday, November 2, 2011
Turkey onesie
I made this the other day for my little boy. I just love love love it!! I used the same process as here.
You can make one yourself or I'm making them for $5 plus shipping, contact me and let me know what size you would like and we will go from there.
You can make one yourself or I'm making them for $5 plus shipping, contact me and let me know what size you would like and we will go from there.


Wednesday, June 8, 2011
Burp Rags
This is my seat of burp rags that I made. I accidentally made them a little small. The next time I made them bigger but I still love how they turned out.
Monday, May 9, 2011
I'm not neglecting you!!
I just wanted to post a little note saying that if I don't have as many projects this week its because I had my baby boy last Thursday!!!
Friday, March 11, 2011
Bumper Cover

I am beyond super excited how this turned out!!! I found this fabric on clearance at Joann's and fell in love with it, so I bought the rest of the bolt it ended up being about 2 1/2 yds, I wasn't sure what I was going to do with it but I knew that I would think of something, this is what I thought of!!
Our first child was a daughter and EVERYTHING that she had when she was a baby was either pink or purple. It was all gifts, so I'm VERY VERY grateful for it don't get me wrong. But when we found out that this baby is a boy, I was kind of in a spot of now I need everything for a boy and nothing we have is neutral. I have been looking at bedding for the crib online and have been shocked how much stuff is. That is when I decided that I can make a cover for the bumper that we already have, using the pink bumper as my guide I made what I think is a pretty cool cover.
 I was able to cut on the fold and get twice as much length out of the fabric then before and it was the perfect width.
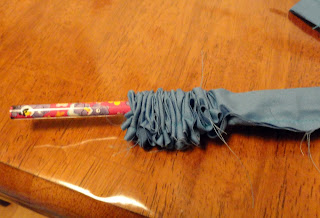
Everything was made into tubes, the actually cover was easy to flip with the right side out. The ties were a little harder, but I have found that using a pencil helps it out a lot.
 Again using the bumper as a model I measure the distance between ties and sewed them the same distance apart on the cover.


Subscribe to:
Posts (Atom)


