Showing posts with label fall. Show all posts

Friday, December 18, 2015

Scarecrow/Snowman Wood Project

 So a few months ago I saw this pinned all over the place and thought it was really cute.  I decided I would make one for myself.  Mine ended up being a lot bigger then hers but I love how it turned out.  Here is my scarecrow side for the fall.


 Here is a close up of the snowman side.


Here is my front porch for the winter.  I love that I am able to get two seasons out of this decoration!!

Wednesday, November 27, 2013

Spider craft

My kids LOVED making these and we have had them hanging from the ceiling of the toy room all fall.  I cut up an egg carton then I poked holes in each of the sides with a really sharp pencil (I didn't want huge holes).  I also threaded some string through the top of the "spider body" so we could hang them later.  I pulled out the pipe cleaners and let the kids have fun.  My two year old did great with it, he could stick the pipe cleaner through one side easily but needed a little help to get it through the second hole but he could then pull it the rest of the way through.  After they had legs I gave them a marker and they drew eyes on the spiders.


My son showing off one of his he made.


One of my daughter's spiders she thought it was fun to have their legs going all crazy.

Monday, November 7, 2011

Turkey Table Centerpiece


My daughter and I made this last week it kind of evolved as we went along.  First we were just going to make one turkey, then I had her cutting stuff out and thought it was good practice for her, so we ended up with 5 of them.  Then I realized that there was no way that the turkey's were going to stand by themselves so then I grabbed the empty toilet paper roll and glued the turkey's onto it.  This what it ended up being.


It turned out kind of fun I think.
Photobucket


abc button For the Kids Friday

Thursday, November 3, 2011

Table Runner

I made this last night, it was super easy, I cut 6 inch strips of the fabric and then sewed them together for the length of the table.  I added a back and some binding.  A NEW TABLE RUNNER!! 

Somewhat Simple
Photobucket

Tuesday, September 27, 2011

Tutorial: Fabric Pumpkins


A couple of weeks ago I shared with you some pictures of fabric pumpkins I made and I promised a tutorial on how to make them.  Here it is finally!!!  These are really simple and you can make whatever size you want.


Materials needed:

scrap fabric (the body of your pumpkin)
a even smaller scrap of fabric (your stem)
pillow filler or a couple of grocery bags
embroidery floss and a large needle
thread and a regular needle


I wanted to make a bigger pumpkin this time. So I used about a half of a fat quarter.


Then I cut out a circle, you can trace something or just free hand it like I did.

Using the needle and thread I ran the thread around the edge of the circle and then tightened it creating a pouch. *Note: be careful to not allow the thread to go all the way through the what you just stitched.

Open the hole up a little bit and add your filler.  I didn't have any pillow filler so I stuffed a couple of grocery bags in there and it worked great!!

Then tie your hole close.


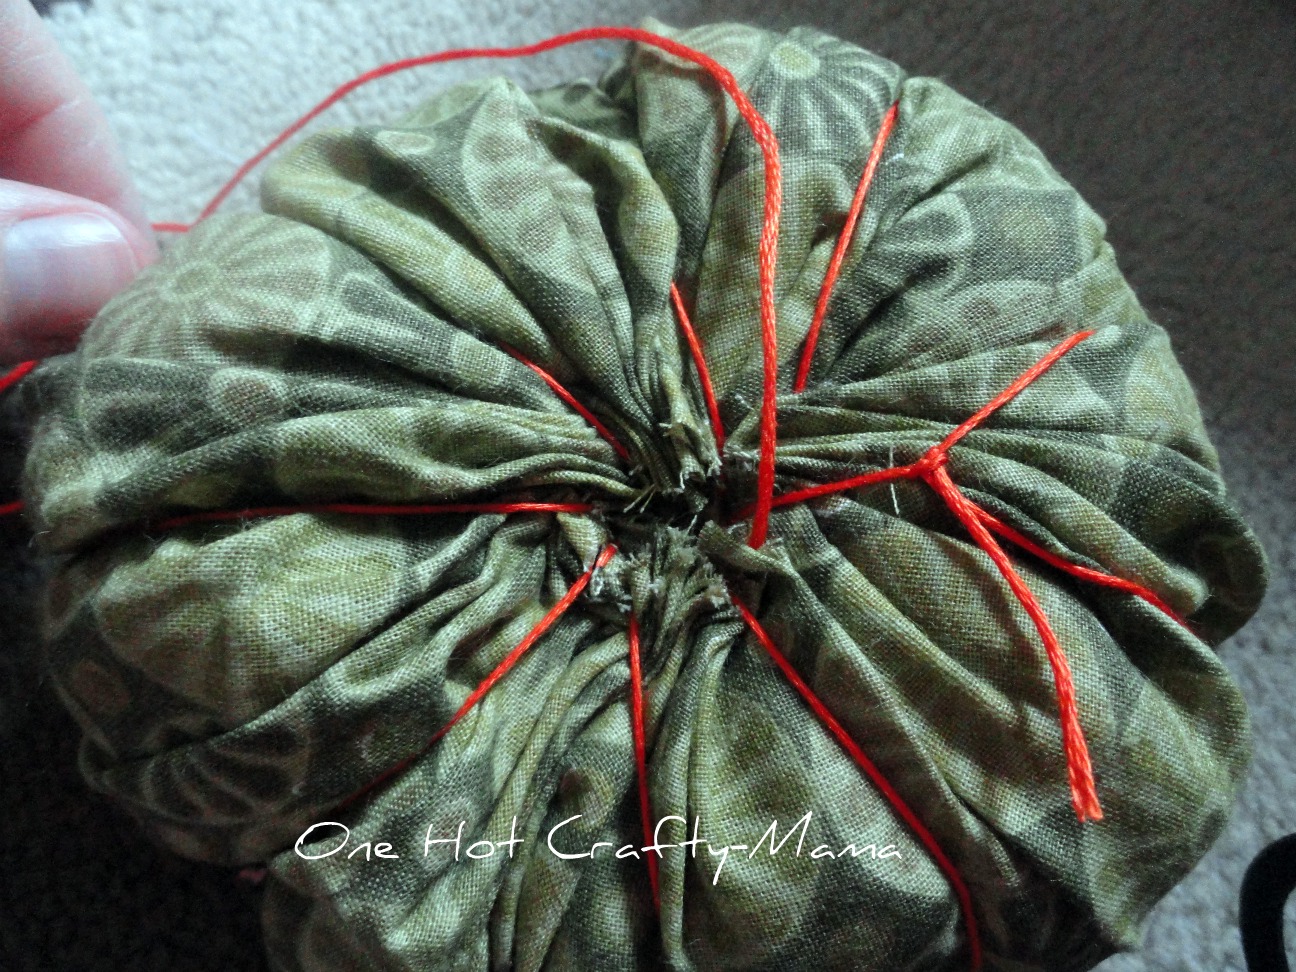
Now using your big needle and the floss, start your needle on the bottom of your pouch and push it up through the middle, don't let the floss go through completely bring the end of the floss around the outside of the pouch and tie it off in the middle.   *Note:  I used all the threads of the floss on this pumpkin on the others I used 4 of the threads.

Go around your pumpkin starting at the bottom up through the middle, to the top and then around the outside back to the bottom (I hope that makes sense), continue at spacing the thread how you want to.

This is what the bottom of mine looks like.
Here is the top.  Tie off the floss I used the same spot that I started with. Now set it aside for a moment.


Now using your smaller piece of scrap create and strip.  However wide or long is up to the side of your pumpkin and how big you want the stem to be.


Fold the fabric in half lengthwise with the right sides together.  Now either use your machine if its handy or hand sew the long sides together. Then flip the fabric outside out and sew the bottom together.

Now its time to attach the stem to the top.  If you are making small pumpkins its easier to just hot glue the stems on otherwise sew it on. 

Now enjoy your pumpkin!!!
Photobucket
lil luna link party button HookingupwithHoH Somewhat Simple

Monday, September 26, 2011

Leaves for your Window


This is similar to something that my daughter and I did in the spring with crayons.  These are fun to look at and creates some cool shadows to look at as well.

First thing we did was go outside and find some "cool" leafs.  Then collected the rest of the supplies that we needed which were:


Turn your iron on a low setting and allow it to warm up while you design how you want your leaves to look on the wax paper.

This was my daughter's favorite part she can't wait to do more when we find some other colored leaves.  Lay your leaves on half of the wax paper.


Then fold your wax paper over creating a "sandwich" around the leaves.

Then put the wax paper between some paper,  I like using that brown paper that comes in some packages.  Then run the iron over it for about 30 sec and then check to see if the wax paper is sealing together,  keep rubbing and checking until its sealed together it might take a little bit depending on how warm your iron is.

This is what it looks like when it is sealed.

Then hang in your windows to enjoy the different colors in your window.

Friday, September 23, 2011

Fall Door for your Honey

Remember the door that my daughter decorated in yesterday's post?  Well I had to do ours and why not turn it into a nice little note for my hubby.


#ff63e0