

Wednesday, November 29, 2017
Princess inspired shirt
Monday, November 27, 2017
Magic Christmas Blanket
I am so excited to share this with you. I made it last year but between kids being sick for two months straight and some unexpected health issues with me I wasn't ever able to post this. So I'm making sure that I do it early this year.
Growing up my Aunt made us a Christmas blanket, it has since then been nicknamed the magic Christmas blanket because you get under it and you fall asleep its so comfy and cozy. We would fight over it every year as to who gets to have the first nap under it. I have wanted one of my own for years, and finally after getting enough pictures of one of my parents sending us pictures of them being the first one getting the nap since no one lives at home anymore. I decided I was going to make my own. I asked Mom for the measurements of hers and went to the fabric store.
This is what I picked up, 1/4 yard of seven different Christmas fabric and then a yard of white Christmas fabric that was going to be my borders. Now the big thing about this blanket is that it isn't very wide but it is heavy. So when buy batting get the thick fluffy kind.
Here is the back of the blanket.
The final product!!! My kids are loving snuggling under it and its just as warm and heavy as the one that my Aunt made for us many years ago.
Friday, November 24, 2017
Matching Sister Aprons
I hope that everyone had a great Thanksgiving. Now really starts the hustle and bustle of the Christmas season. I wanted to start off with sharing a quick and easy gift for anyone but that its still a lot of fun for the recipient.

I made these matching aprons, for my nieces for Christmas. I also embroidered their names onto them. It's is always fun to have a cute apron to bake in and even better when it matches your sister!! To complete the gift I also added some cookie and cake mixes. Quick and easy but a lot of fun to make memories with.
Wednesday, November 22, 2017
Antique Piano Repurposing, Part 2....Hall Table
If you missed our first post about this piano that we are giving new life to you can check it out here.
Now to continue on our story....

We left with the piano looking like this. I forgot to get a picture of it right after we removed the harp. We wanted to keep the front portion (where the keys sit on the piano) so that required us to cut that section out. That led to fun with a skill saw :) Surprisingly, it was very easy.

Here is how it looked right after my husband cut it out. Nothing like commandeering your garage and turning it into a mini workshop! The large section left on the floor? Don't worry it has more life to give and we will get to it another day.


 |
| On of the pesky pillars |
Next there was a lot of sanding, and sanding and then more sanding followed by wiping it down to get all the dust off of it. It might be hard to tell, but there are lots of groves and small spaces that made sanding difficult, particularly the pillars on either end. But somehow the job always gets done, just a little time and elbow grease.....and it makes for a great excuse to get an orbital sander!


We used a stain-polyurethane combo from Minwax, put on in two coats. If you remember my husband's sled restoration project he did the staining and polyurethane as two separate steps. After doing this he preferred the end result with having them done separately (staining, then applying a polyurethane) as they were done on the sled.

We wanted to create sort of box-like structure for the glass top to sit
in, thus we didn't cut the ends down all the way flush. We used some of the
wood from another part of the piano to go across the front closing it in, also slightly raised from where the glass would sit. So now we were left with the sides and front closed in and the backside open.
We cleaned the keys and put them back in their spots and brought it into the house. We did a lot of looking around online for glass businesses where we could order the top from. It was a little trickier that I thought it would be. A lot of local places didn't do table-top glass. Online stores could ship it but the price of shipping was more than the glass itself. Then there was the type of glass: 3/16 inch vs 1/4 inch vs 3/4 inch vs annealed vs tempered vs beveled edge vs rounded edge vs...well you get the idea. We ended up finding a local place and the price was great and we were able to drive down and pick it up a couple days after ordering it. We didn't want to drag anything out hemming and hawing on which glass would be best, so we went with a 3/16 inch-thick, annealed glass with a straight smooth edge and it was perfect! We measured where the glass was going to sit, then measured it again....and again. We don't have a glass cutter and didn't want to mess with that, but shop class paid off and the size we ordered fit right into the spot we had created. Otherwise, trying to cut it or taking it back to the glass store for a resize would have been in order.
We cleaned the keys and put them back in their spots and brought it into the house. We did a lot of looking around online for glass businesses where we could order the top from. It was a little trickier that I thought it would be. A lot of local places didn't do table-top glass. Online stores could ship it but the price of shipping was more than the glass itself. Then there was the type of glass: 3/16 inch vs 1/4 inch vs 3/4 inch vs annealed vs tempered vs beveled edge vs rounded edge vs...well you get the idea. We ended up finding a local place and the price was great and we were able to drive down and pick it up a couple days after ordering it. We didn't want to drag anything out hemming and hawing on which glass would be best, so we went with a 3/16 inch-thick, annealed glass with a straight smooth edge and it was perfect! We measured where the glass was going to sit, then measured it again....and again. We don't have a glass cutter and didn't want to mess with that, but shop class paid off and the size we ordered fit right into the spot we had created. Otherwise, trying to cut it or taking it back to the glass store for a resize would have been in order.

Here it is with the glass!!


This is one of my favorite parts, the beautiful ornamenting on the table.

One of the best parts is you can still see the keys!!
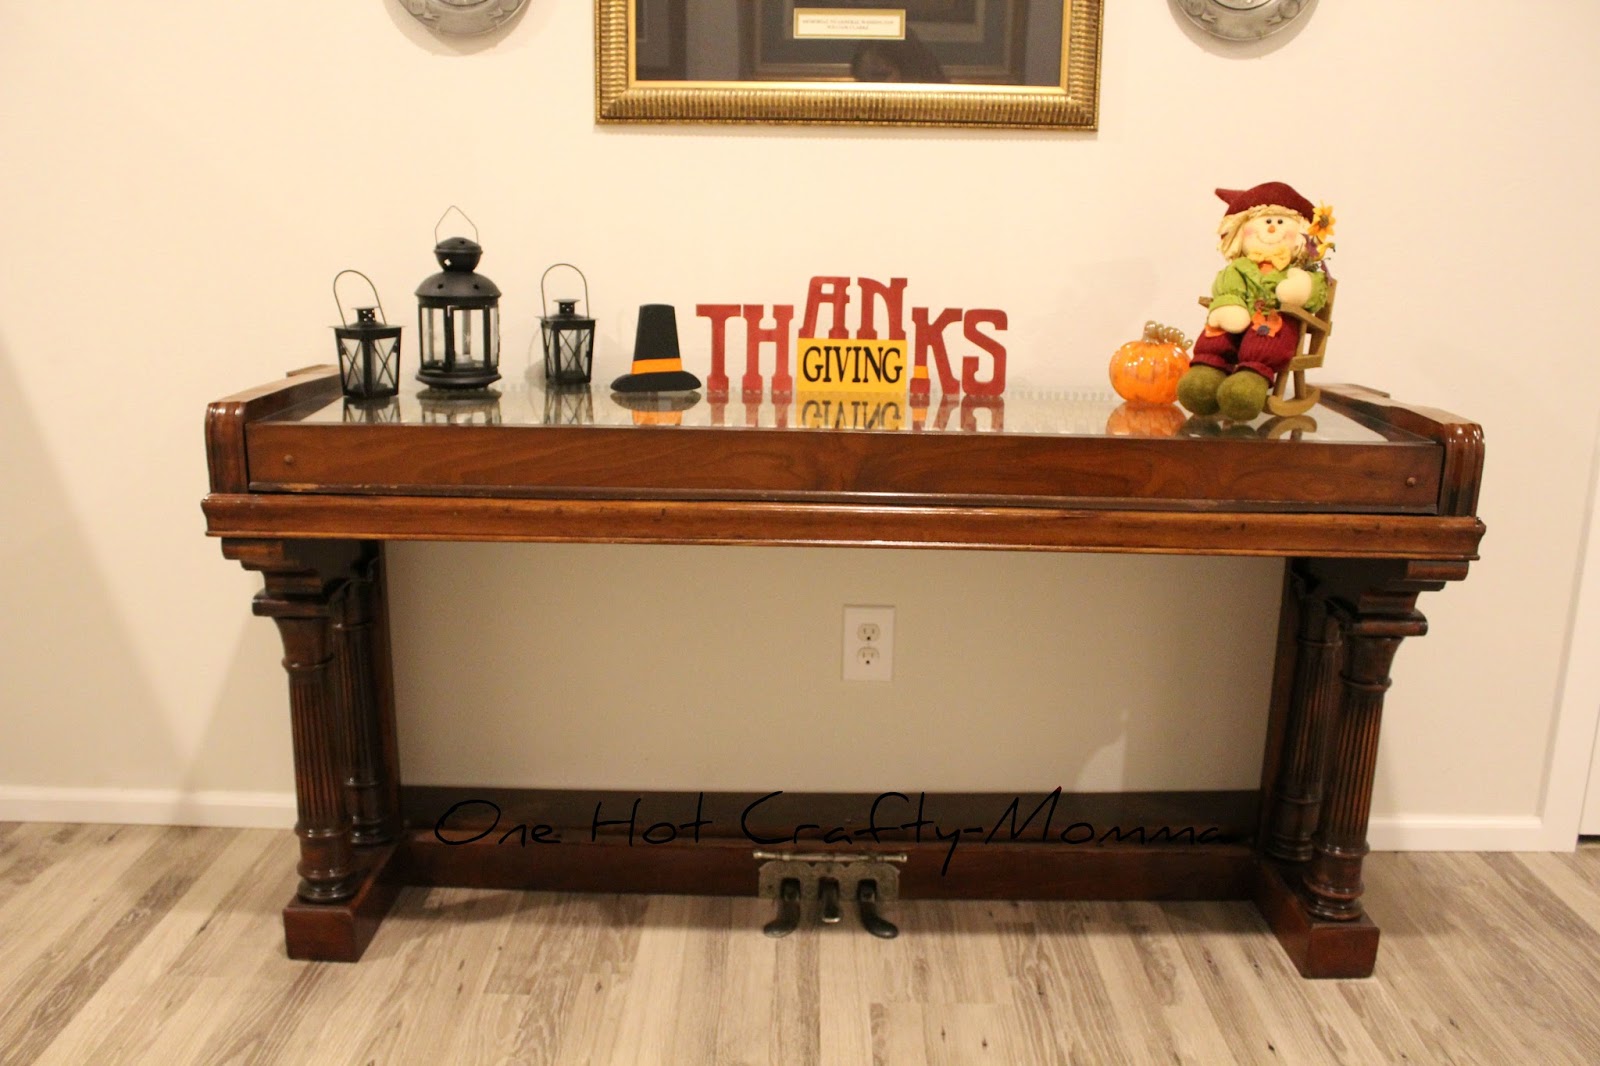
This is sitting in the hall of our front entryway.


I just love it!!!
Stay tuned for more projects from the rest of the piano.....
Tuesday, November 21, 2017
Baby Blanket
Monday, November 20, 2017
Antique Piano Repurposing

I'm so excited to tell you about this project/s that we have been working on!!! First, though, I need to start with a bit of a story. A friend of ours was giving away this beautiful piano, I thought it would be great to have a second piano in my piano studio for lessons. Overall it was in pretty good shape but we knew that it needed a little bit of work and we were OK with doing a few things ourselves to fix it. We rented a truck and moved it into our house (and that short sentence does the fun of piano moving NO justice at all!) A couple of days later our piano tuner was over to tune the other piano and he checked out the new one a bit more in depth with us (well really A LOT more in depth.) He pointed out that the sound board and all of the string bridges were cracking. His explanation really made it obvious why this is typically a death sentence for a piano as you have to dismantle the piano to repair/replace those elements. He also said that the piano was over 100 years old and that tuning the piano might be a bit more difficult and there was a good possibility that the strings and/or the bridges might break in the process. The action also needed a near-complete overhaul. He told us that to fully fix it it would be upwards of $8000 (even more) and we could tune it and possibly play on it for another few years but once the bridges completely break (assuming they didn't during tuning) then it would be back to spending more to fix it. We thought about it and decided that we wanted to really enjoy this beautiful piano but we wanted give it life in another way and we had a few ideas in mind.
The first item of business was to take it apart, but in a way that it would still serve the ideas that we had. At times that made things tricky.


We removed the front panels, keyboard lid and music stand, that was the easy part as it entailed popping out just a few screws. The piano collected a lot of dust over the years and vacuuming out the inside of a piano isn't something that is really done often (though after seeing this I've decided it should be.) As were taking it apart there were many times we had to stop and vacuum out the dust....and dead spiders.


Next up we removed the action. The action is home to the hammers and all the parts that cause them to hit the strings. It's really quite an elaborate and ingenious set up. Surprisingly, removing it was fairly easy as actions are usually only held in place by three or four screws. This one had four and once they were removed it lifted out quite easily.


After removing the action the next item up was the strings. Now you have to do this carefully because there is a lot of tension on them and you don't want one to snap and hit you (read: safety glasses and gloves!!) Usually a special tuning device is used to turn the pegs the strings are on and of course we didn't have one. This simply meant trying various metric and standard sockets until we found one that fit snug enough to loosen them. We turned each peg until the string was released from all the tension and then popped the string's end off the bolt. Next came the fun part of removing them from the piano. As a side note, the entire time I was doing this part I was singing out loud and in my head "past the point of no return!!"
 |
| Action and all strings GONE! |
The keys were easy to remove as they lift right out and these were in great shape considering their age. Now removing the "harp" (the big heavy metal part) of the piano was hard since it had been screwed into the sound board for 100+ years and the screws they used were quite large. Getting them out entailed finding a tight fitting phillips-head screwdriver and then applying a very firm and steady force so that it was enough to get it moving but not strip the head out. Some of them were also in very awkward positions where getting a screw driving in place was almost impossible. My husband ended up having to drill out some of the screws because they wouldn't budge and stripped out. We also moved the piano out to the garage at this point because we were going to do some cutting (the two of us moved it....more piano-moving fun!!)
|
| Out in the garage, keys off and ready for the next phase. |
Friday, November 17, 2017
Clock in the Front Entryway
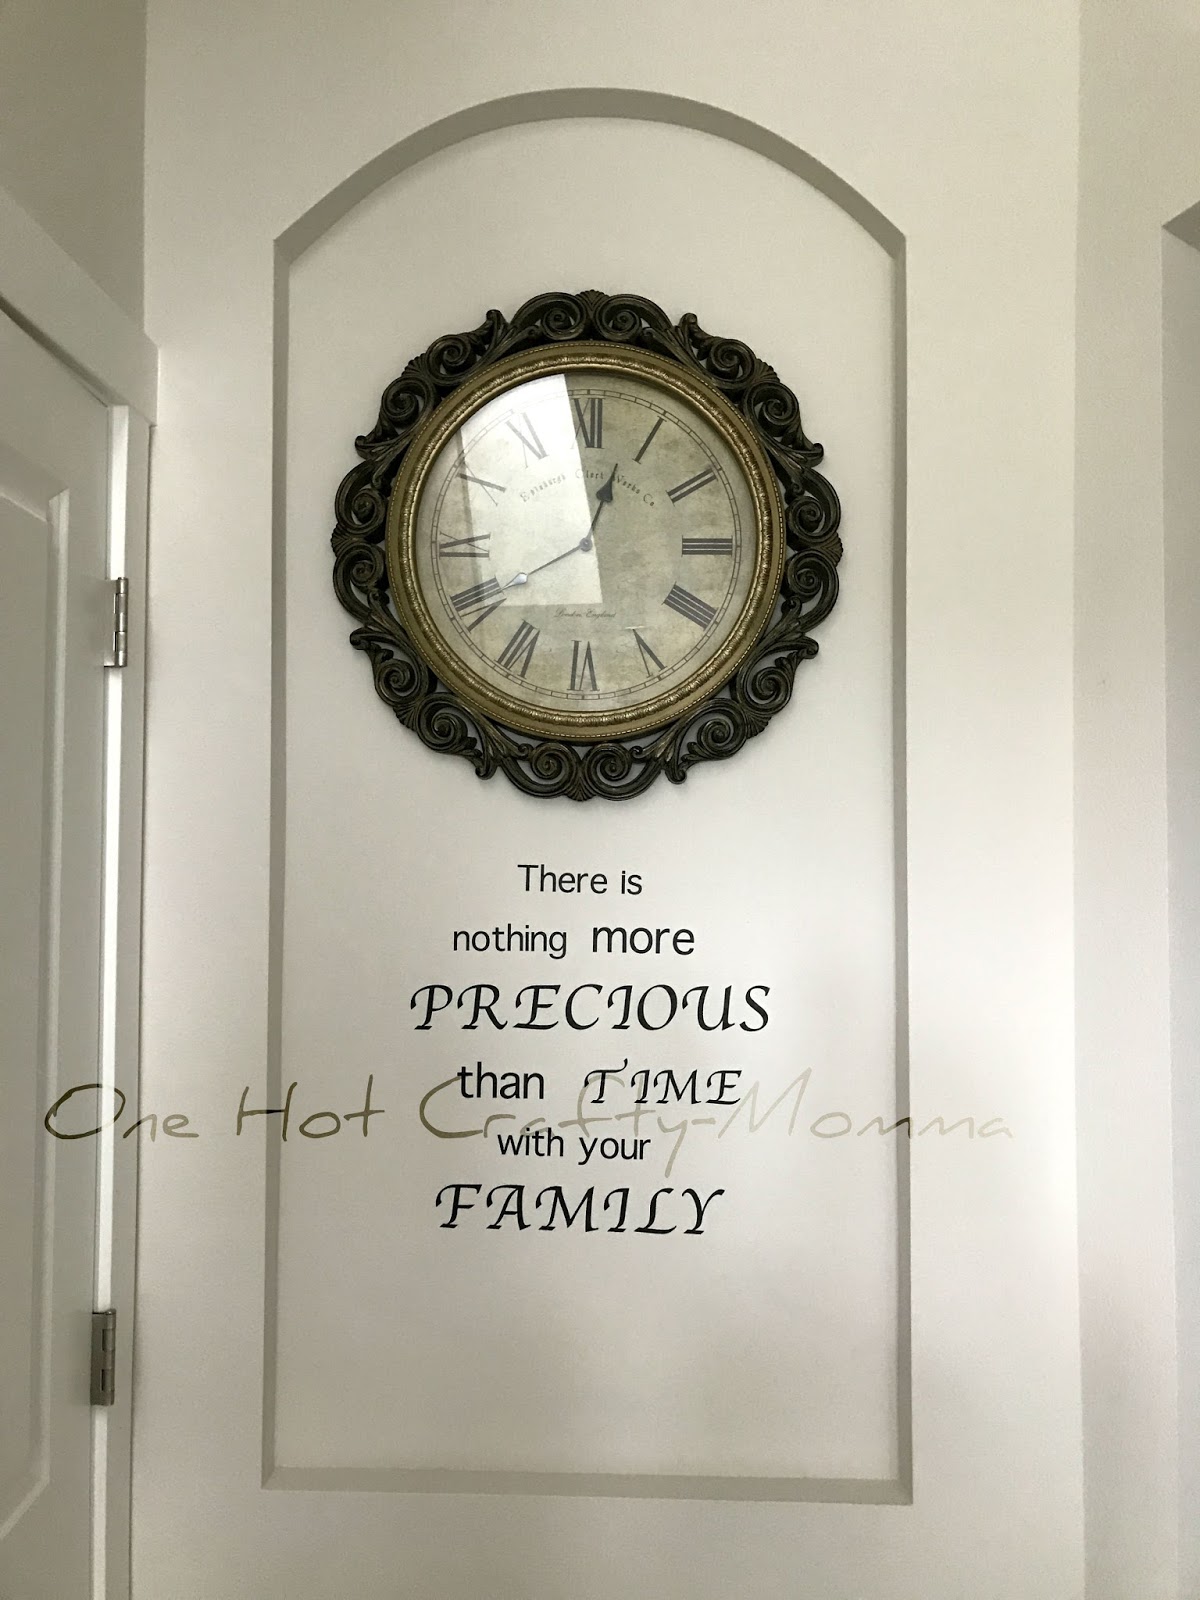
So we bought our house in March and have been having tons of fun doing little projects and decorating it. I can't wait to show you things that we have done!! Here is one little project that we did. We had this little inset that you see right when you come in the front door. It took us a little bit but we finally decided what we wanted to do in that spot. This is what we came up with and I couldn't be more excited about it. I cut out the lettering on my Cricut and then hung the clock.
Subscribe to:
Posts (Atom)