So my husband surprised me at Christmas with this sled that he restored. I think that it turned out way awesome and he was willing to write a post about the process that he went through doing it. I'll turn it over to him.
Recently at a local auction I came across an old Flexible
Flyer Airline Junior sled. The bidding war was fierce, but I came out
victorious. Actually, I was the only bidder and got it on the cheap, but I was
happy nonetheless. For being in the ballpark of 50+ years old it was in
surprisingly good shape and none of the wood was broken. However, the
original finish was pretty much gone and the metal parts were rusted with most
of the paint on the bottom of the runners missing. It was dusty beyond
belief too. A last minute jolt of inspiration gave me the idea to restore
this "vintage" item and give it a breath of new life. I have
never attempted this before so I did a lot of trailblazing and a lot of improvising
as I went along. But in the end, I think it turned out nicely and I could
definitely see more of these projects in the future. Get your tools and
get ready to have some fun!
 |
Like a dirty car with "wash me!" written in the dirt on the back
window. This guy was just waiting for a face lift!
|
 |
There at the top right you can see finger prints from handling the
sled...this thing was dirty! Before moving on to the actual tear-down of
the sled I took A TON of pictures from many different angles. I was
careful to get good shots where there were multiple parts coming
together. Although this is a smaller sled I wanted to be able to have a
good idea of how things go back together to avoid the infamous "left
over" parts after a rebuild project
|

There were no screws holding the sled together. The part you sit on was nailed to the supports beams. The side-frame and steering components were all held together with rivets (rusted, stubborn, don't-want-to-move rivets to boot.) If you've ever dealt with rivets before you'll know that they are made to hold tight and not let go once it is seated in place. You can almost count on them being a permanent thing. I did say almost, right? This is where a good old fashion drill comes in handy....and some patience, finesse (drilling and finesse??!! I must be crazy) and elbow grease.
The drill, because as I mentioned the rivets are meant to hold tight once put in place, which is evidenced by the fact that not one was missing, broken or loose. What I did was use a drill with a 1/8 or 9/64 (size depending on the rivet) drill bit attached. The finesse, because I would place the drill bit over one end of the rivet and rev it up and care is needed not to let the drill slip off and have the bit dig into the wood. The patience and elbow grease, because there were a lot of rivets holding this thing together and they like to stay put! I would run the drill until it had gone in enough to remove that end of the rivet (or at least hollow it out nicely.) Luckily, the design of a rivet allows it to come loose when one of its ends is no longer there. Since they were rusted out I also had to put a Phillips head screw driver into the drilled-out end and give it a few strong whacks! to punch the rivet out. There's no sugar coating it, it took a while to drill through each one and some were more stuck than others.
 |
| Rivet on its way out |

Those rivets couldn't stand up to the mighty drill bit and screw driver.

The steering mechanism had the most parts meeting up so I took extra pictures
Success!! Rivets out, everything taken apart and ready to be cleaned up.
So there were a couple of different direction to go with cleaning the metal and getting it ready to paint. The first involved using steel wool to scrub the metal clean. I started doing that and found a several day project would probably turn into much more than that. I wanted everything off before painting them and it just wasn't getting the metal cleaned like I wanted. So what did I do? I took to Google and found a local business that does sandblasting. The picture above is the result of a relatively cheap ($$-wise) sandblasting job. The metal was perfectly clean and rough, perfect for a primer and paint to stick to.
With the metal ready to go it was off to the store to look at paint. If
you've ever walked down the aerosol paint aisle you'll know what I mean
when I say your options are almost endless. There were so many paints
to choose from--high gloss, some gloss, no gloss, anti-rust,
primer/paint combos, water-resistant, metal and plastic specific and on
and on. Your end goal with your project will likely determine which
product you choose. I wasn't planning on using this sled in the great
outdoors so I didn't need the
super-water/rust/abrasion-resistant-dries-hard-as-a-rock-all-powerful-primer-paint-combo
(I totally made that up, but you get the idea.) This sled is going to
be a decorative item in the house (boring, I know) so I opted to go with
a simple gloss protective enamel paint.

After some searching I decided on a product and picked up some primer.
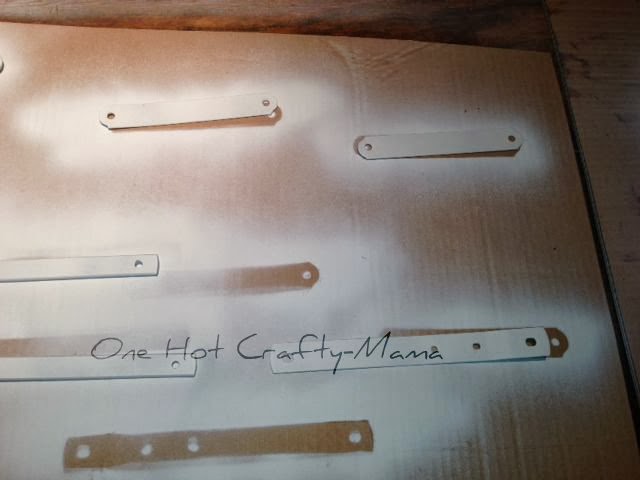
This one to be exact. I placed the metal on some cardboard, shook the can like crazy and sprayed it on. Once it dried I flipped the parts over and repeated on the other side. I applied two coats of primer following the directions on the can.
With the primer on and parts dry I was ready to apply the gloss paint. I wanted to go for that shiny "hot-rod" look so I opted for a gloss enamel rather than semi- or no-gloss paint. I stuck with the same make and got
this enamel in black for the steering parts and cherry red for the runners.

I followed the same procedure as with the primer, painting one side and letting it dry then flipping it over and repeating. I'm no professional painter so I didn't have anything to hang them with so it was back to the cardboard. You have to take care not to cake the paint on otherwise they can stick and when you pick them up part of the paint can come off the edges. After the prescribed two coats I noticed that they didn't have that awesome candy-hard, glistening enamel look that I was wanting and in fact they were slightly rough. Unfortunately (but in this case, fortunately) I had nicked one of the edges of one of the rails and chipped off some paint and needed to touch it up. This entailed putting a third coat on that one small area and once this had dried it was smooth as can be and super glossy. Just what I wanted!! All the pieces got a third coat and were shining and glossy as can be.
Metal parts done....on to the wood parts!
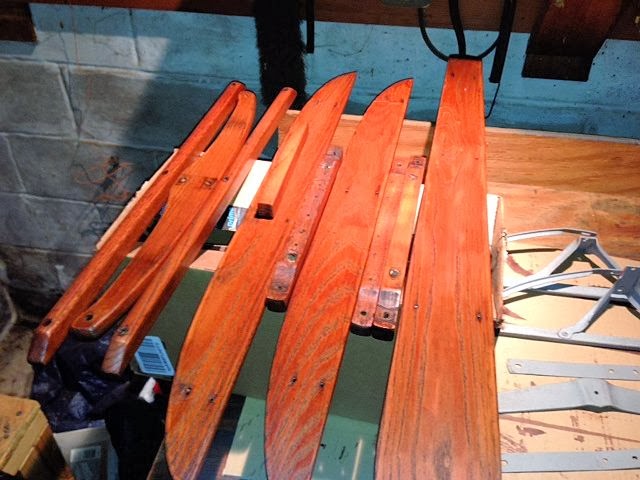
I'm not sure of the type of wood (I slept through that part of class) but it was still in really good shape and just needed a good sanding and staining. To get the surface ready to accept a stain you'll want to remove present finishes using a gritty sandpaper and then smooth the surface with a finer grit. I used a 120 grit to get rid of the current stain and markings (logo, other printed information already present.) It took some work and in retrospect I'll probably use a grittier sandpaper (probably 80) next time to make the job easier. After getting the wood clean I moved to a 220 grit paper and sanded it again to give it a smooth-as-a-babys-bottom feel and ready it for staining. Choices for staining were almost as numerable as those for paints, but not quite. I opted to go with
Minwax stain in the Red Oak finish. I purchased a small 8oz can and this provided plenty of stain with leftover for the next job.

There are many ways and techniques to apply stain and I'm by no means an expert saying this is the be-all-end-all method. Either way, I applied the stain using a foam brush, let it sit for roughly 10 minutes then wiped the excess off with a rag. After letting it dry for the prescribed time I applied a second coat, but only let it sit for about 5 minutes before wiping off the excess. I wanted a dark look but not
too dark. I was happy with the results.

Staining probably would have been enough but I decided to add an extra layer of protection (and I also wanted it to give it that shiny look.) That led me to a polyurethane finish. I again went with
Minwax. The 8oz can was more than enough since only a thin coating is needed for each application. Following their directions I applied a thin coat with a foam brush, let it dry, flipped it over and repeated. After drying I applied a second coat and they have you
very lightly sand with a fine grit (220) sandpaper before applying that second coat. I want to emphasize the
very light part of that sand job because you don't want to remove much of that first coat (and heaven forbid, your stain.) This is just to smooth out the first layer of polyurethane because as I ran my hand over it I noticed some imperfections and raised edges.

After applying the second polyurethane coat the wood was smooth and glistening. I suppose a third would prove even better, but I stopped at two.
Now came what would inevitably be the multiple trips to Lowe's for screws, bolts and nuts and the real trial and error would begin. I opted to put the sled together with bolts rather than rivets for a couple of reasons, but mostly because I didn't want to buy a rivet gun. The rivets were fairly torn up from the drilling and hammering but were still able to supply a rough estimate for length and circumference of the bolts I was going to need. I measured them all out and headed down to the store for the goods. I purchased brass parts because I thought it would blend well with the stain on the wood. If any nut was going to be in contact with the metal I used a rubber washer so as to not damage the gloss finish. Luckily all of the nuts and washers attach to the bottom and are out of site, so I guess I did this as more of a "hey, I spent a lot of time painting this dang thing and I'm not gonna have some nut scratch it up even if you don't see it!!!" kind of deal.
I ended up using some 1 1/2, 2 and 3 inch bolts for the mainframe. Circumference-wise they were 10-24 although this can vary depending on the size of the holes in both the wood and metal. Luckily (I seemed to have a lot of that with this project) they were all 10-24 and no further drilling was needed to make any holes bigger.
For the main boards I used brass screws instead of nails and here is where I learned another lesson. While the polyurethane didn't fill the holes it did narrow them a bit and this proved problematic when it came to drilling in the screws. The screws were #4 and while this isn't a completely thin, flimsy screw it isn't a big, thick one by any means. On the first screw I could feel quite a bit of resistance as it was going in until that ominous snap! indicating the screw had broken. I immediately stopped drilling, removed it and thought for a moment. I pulled out my drill bits again and chose one that wouldn't make the hole any bigger (I don't think I would have survived another trip to Lowe's) but did clear the way for the screw. All 18 holes were cleared out quickly and easily and the rest of the screws went in without a hitch. Below was the result of all that hoopla.

The next part to tackle was the steering. When this sled was made it apparently made quite the impact because of its "patented steering mechanism" at the time. What this basically meant was that when you would turn the steering bar one way it would also cause the runners to turn in that direction. For this part I found an interesting screw at Lowe's that I had never worked with before:
Post screws
They act like a rivet with a less permanent attachment. In the picture below you can see that I used a post screw in the parts that actually bend and move when the steering bar is turned either direction.
The final touch was purchasing a short segment of nylon rope to fish through the holes in the steering bar and tie off.


Overall, this was a fair amount of work but a TON of fun. Considering how this sled was before starting and how it looks and feels now makes it worth it 100% You can also see that I didn't add any type of logo or print back onto the wood. There were several reasons for this with the biggest being a time constraint and this being my first restoration project I didn't have the know-how to get it done quickly. The next time around I will certainly invest some time in learning how that is done so I can play around with that aspect of it.