Wednesday, February 5, 2014

Temple Primary Bulletin Board

I know that I posted something on Monday with Primary but I also wanted to show you guys what we are doing throughout the year on one of our bulletin boards.  With the theme this year being Families Are Forever we wanted to focus on the temple and that our goal is to go there.

 I didn't take pictures of the first steps I did.  I took a picture of the temple that we are assigned to attend and divided it into 12 squares one for each month of the year.  Then using that "grid" I drew it onto 12x12 sheets of paper.  Some of the "squares" are smaller then others.  Since the Washington DC temple has 6 spires there are a few months that we only add the spires. This picture is when I had drawn everything out in pencil and I wanted to make sure that it looked like the temple.

 This is after I went over all my pencil lines with a sharpie marker and then cut out the pieces.  I wanted to see what it looked like completely.  After I took this picture I colored Moroni yellow so he popped out a little bit more (he is on the first spire on the left).


Here is the bulletin board.  At the beginning of each month we glue a new square onto the board.  With it being February now we have two squares but I took this picture last month. :) The kids are having fun trying to figure out what the picture is, some already know but we told them to keep it to themselves so the others can still figure it out.  I can't wait to see it completely on the board.


Monday, February 3, 2014

Birthday Blocks


At church I work with the kids up to age 12 we don't have a lot of kids in our group just because of the size of the congregation, so we wanted to do something a little different for them then the usual pencil and bracelet.  This is what we came up with.  

We had a 2x4 cut into 6 inch pieces for us.  We made a total of 20 complete blocks and we still have probably another 15 unpainted blocks leftover from the project.  As you can see we painted them all black.

  After the paint dried we used mod podge and attached a picture of the temple that we have been assigned to attend.  In this case it is the Washington D.C. temple.  We were originally going to find out what each kid's favorite temple was but then decided that it would cost too much and might be difficult to get a picture of that temple the size we wanted.  After the mod podge dried we added the vinyl saying (which I cut out on my cricut and I got about 26 of the saying's to the sheet) then put another layer of mod podge to secure the vinyl on the blocks (mostly because we were giving them to the kids).

For the girls we attached a purple ribbon around the block.  After giving the first block to one of the older girls yesterday I suggest hot gluing the completely around the blocks.  I only glued under the block and she had untied it and removed the ribbon from the block then had trouble getting it back on.  The boys are receiving green ribbon and I hot glued the ribbon all around it.


The overall cost for everything less then $10

The 2x4 was around $8, I already had the mod podge as well as the paint and we really didn't use that much of either.  We made copies of the pictures of the temple and then I only used one sheet of vinyl that cost me $.99  We are excited how it turned out and the kids were excited to see them for our first birthdays.


More the Merrier Monday

Friday, January 31, 2014

Another Boy Onesie

 Ok I told you guys that I was excited about this one earlier this week.  I have seen onesies similar on the internet and have always wanted to make one then the hat kind of came along for the ride to complete the package.

 I used a pattern to make the hat.  

The actual onesie itself I kind of winged it and I'm thrilled at how it turned out.  I will definitely will be making more of these.


More the Merrier Monday

Wednesday, January 29, 2014

Baby boy onesies

 My sister-in-law is having her first baby in March, they found out it is boy.  I made some onesie's for her.  This one I made from an inside joke they have with my oldest daughter.


Here is a close up.


I made this one because hockey is a big sport in my husband's family.  I have another onesie to show you guys but I'm saving it for another day I am really excited about it.

Monday, January 27, 2014

Bathroom Redo


I am so excited! My mom has been doing some upgrades on her house this past year.  I asked her if she would share some of them that they did with all of you.  I'm so happy that she did this.  Thanks Mom!!


My daughter asked me to share a little bit of some of the projects we did this summer/fall/winter.  There are a lot of projects so we will start small.  Here is what we did in our master bathroom.

It started out a sage green (sorry, I didn’t think I was going to need to take a before shot of the wall color).  We paid a contractor to tear out our existing shower, install a new shower (which entailed putting tile on two walls) and put new tile on the floors.  Here are the before and after shots of that.


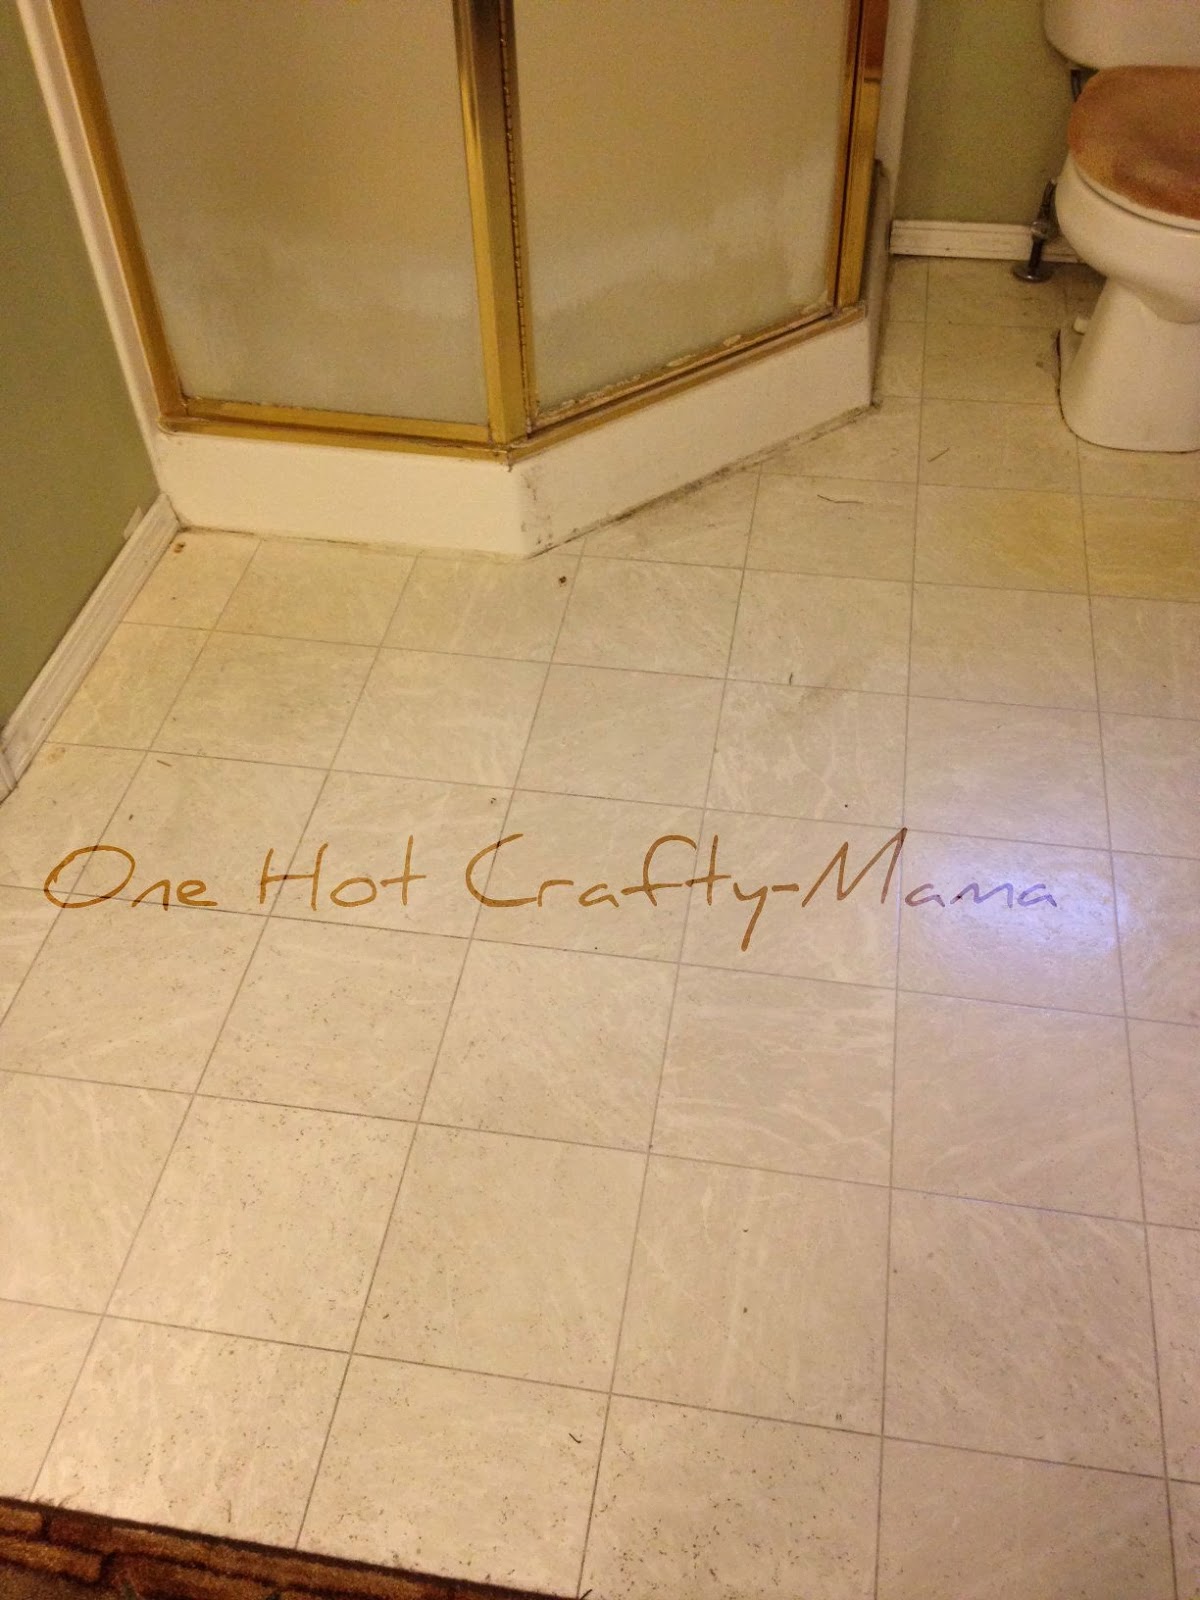
You can see some of the green wall color in these pictures.  This shower was old and UGLY!!!

The floors were showing their age as well!  You can see how the contour rug had discolored the floor around the toilet.


As a side note, a few years ago I sanded down the cabinets (they were that pinkish tone bleached oak) and then stained them Minwax Red Mahogany gel stain.  I ended up using that same technique in my kitchen (I will show it to you another time).


Here are the after shots.

Yes, that is tile not wood.  I wanted the durability (and water resistance) of tile but I really liked the look of wood.

The accent strip is leftover tile from the backsplash we did in our kitchen.  We are so glad we paid a contractor to do this job--he struggled with the shower install so there is NO WAY we would have got it right.

Our bedroom and bathroom had been painted the same wall color.  In the middle of all our projects I decided the bedroom needed to be repainted a more neutral color.  This, of course, meant the bathroom was going to have to be painted. 

Here is what the sink/countertop/mirror looked like before.


I actually painted the “panels” between the glass over the lightbulbs when I painted the bathroom green several years ago.  I never really did like the light fixture at all so NOW was the time to replace it.

Here is the new fixture:


We had a hard time finding a light fixture, for the price we were willing to pay, in the oil rubbed bronze that we had switched all our faucets.  We ended up buying one in a brushed nickel finish and I spray painted it with Rustoleum Oil Rubbed Bronze spray paint.

You can see the new wall color as well.  I still wanted to keep the “tropical” theme but figured neutral walls would give me more flexibility in the colors I could introduce as well as make my existing decor really pop!

I have seen several posts on pinterest on “framing” contractor grade mirrors.  I have wanted to do it but my husband was afraid it would make it feel closed in.  After putting the new light fixture up I really wanted to put a frame on the mirror.  When I sent my daughter the above picture she said the same thing so I just told my hubby I was going to do it.  We are BOTH glad we did it!!


I had read several posts about how to do it but obviously didn’t pay attention to ALL the details--I will explain more in a bit.  I knew I would never get the corners mitered the way I liked them so I bought decorative corner blocks so I could cut the moulding with straight edges.  I bought wood moulding and wood corner blocks.  I stained them the same Minwax Red Mahogany gel stain as the cabinets.  I glued the four corner pieces onto the mirror, then I measured (twice, teehee) the distance between the corners to know what size to cut my pieces of moulding.  I measured each side because I knew that each set of sides would not be identical.  Case in point, my left short side measured 30 3/4” and the right short side measured 31”.  I used adhesive I found at Lowe’s that said it was instant setting (liars!!!).  I let the corners set for about a half hour but as I measured and then installed the sides those corners sure moved around A LOT!!  It took some patience but I got the pieces up.  One of my moulding pieces was bowed so it took both of us to push on it to make it stick.  The picture up above is when I finally got it all to stick----or so I thought! 

The next day I noticed that one of the short sides was also bowed and it had popped off halfway down.  I tried to squirt glue in there--easier said than done.  Still couldn’t get it to  stick.  In all that mess, the entire side popped off.  So I tried gluing it all over again.  Next day it still wasn’t stuck.  So I popped it off again, scrapped off all the glue on the mirror (a straight razor blade works GREAT!) and the back of the board (I used a flat screw driver for that).  I looked up on pinterest other posts to see what they used for glue and one said she used good old HOT glue.  So......I went and got my trusty hot glue gun and gave it a shot!  It STUCK--bowed end and all!!!  You have to work fairly fast with the hot glue because it sets up fast as it cools.  Be ready to attach it to the mirror quickly and get it exactly in the place you want it on the first try. 

The same blog post said she had done TWO mirrors.  One with wood moulding and one with MDF moulding.  She said she had the same problem with bowed wood (that’s why she ended up using the glue gun) but no problem with bowing with the MDF.  She spray painted the moulding using the same spray paint I had used on my light fixture.  I don’t have anymore mirrors that need framing but if I was to do it again, I would use MDF and my good old HOT glue gun.  This gal said she also used super glue in some of the more stubborn spots.  I didn’t have to resort to that to know if it works or not.

That’s it for my bathroom projects......for now!  We are going to put ledge stone on the skirt of our jetted tub.  I will take pictures and do a post on that when we are done.


TDC Before and After

Friday, January 24, 2014

Guest post: Kathy from Yorkshire Linen

I'm very lucky today to have Kathy from Yorkshire Linen to guest post here today.  She is sharing tips on how to get a Bubbly Bedroom.  Have fun!!


Hi everyone, I am Kathy Joe and I am a home decor admirer. I love to see the world from a different perspective- where everything can be made beautiful and pretty. For keeping a track of more of my posts, please visit my blog here.

Ten Tips for Getting a Bubbly Bedroom
Why should children be the only ones to have bright and engaging bedrooms? Grown-ups want them too! If you want to create a funky bedroom that oozes fun, use bright colours and unusual accessories to create a lively, effervescent atmosphere that you will want to do more than just sleep in.
 Use Happy Colours
If you are painting or redecorating, think bright and bold. Consider the primary colours and variations on them (paler or darker), and then team them up with colours that contrast. Use check, spots and stripes, but above all, remember a bubbly bedroom must have some strong colours.
 Funky Bedroom Furniture
Incorporate some unusual bedroom furniture into your bedroom, such as a red lips sofa, inflatable chairs, a hanging bubble chair, a futon or an unusually shaped radiator. Alternatively, overhaul what you already have: re-upholster your existing furniture with some jazzy fabrics and cushions.
 Beds with a Difference
Children’s beds are available in some really fun designs, such as cabin beds, car beds, wig-wams, tents and tunnels, and even fire-engines. Consider a glass bed or hammock or recreate your existing bed with some fresh, bold bed linen and drapes.
 Re-vamp Your Bed
Add a variety of quirky shaped cushions, a bed runner, an extravagant bed canopy, or some loopy bed covers or blankets arranged over the foot of the bed. Use different textiles and experiment - give your bed some attitude. For quirky and opulent bed linens, I always prefer going to Yorkshire Linen Co Store.
Brighten Up the Windows
Make some unique, personalized tie-backs to brighten up what you already have. Add some printed or coloured voile panels in place of nets, or consider roman blinds, venetian blinds or a brightly coloured roller blind in your window. For a variety of venetarian blinds, my favorite place is Direct blinds.
 Pictures and Frames
Family photographs in wooden frames can be a little dull. Be adventurous with bold picture frames and what you choose to frame. Get inspiration from outdoors, such as branches or use things you see lying around. Use photographs taken from bizarre angles: experiment and be creative.
Accessorize
Use what interests or excites you to make your bedroom feel alive. Accessorize with blackboards, balloons, quirky lamps and ceiling lights, lava lamps, bean bags, ceiling mobiles, rugs or mats.
Storage Solutions
Look around for unusual storage ideas that you can incorporate into your bedroom. As well as brightly coloured wardrobes in place of the old dull ones, you could use brightly coloured storage tubs and units, hooks, clothes organizers that hang from the ceiling, and so on.

Lighting
Re-create a party atmosphere with coloured bulbs, a disco ball or a mirror ball. You can project lights onto the ceilings and walls, or even the solar system if you prefer. Use neon signs on the wall, fiber optic lamps for a magical effect, or get some fairy lights to arrange around the bed or hang vertically down the wall. Apart from the traditional sparkling fairy light, different shapes and colours are available.
Brighten up Dull Walls
Paint bubbles on your walls, circles and swirls, use wall stickers or motifs or get creative and use stencils. Think about your hero, favourite pop-star or film-star, your hobby, a place you love, or somewhere you want to visit and print this on your wall. Be creative and turn a blank canvas into a funky reflection of yourself.
1|2|3|4|5|6|7|8

Wednesday, January 22, 2014

Girl Valentine T-Shirts

Monday I showed you the shirt I made for my son, today I want to show you the shirts I made for my daughters.  This one is for my 16month old.

Struttin' her stuff

Here is the shirt for my other daughter.


More the Merrier Monday

Monday, January 20, 2014

Boy Valentine Day Shirt


I wanted to share the Valentines Day shirt I made for my son.  I put it on him to take pictures and he refused to take it off again. 


More the Merrier Monday